
Peacock feathers
|

Colourful Rocks
|

Durian Fruit
|
|---|---|---|

Carrots
|

Octopus
|

Toucan Head
|

Cthulhu
|

Toucan Wings
|

Layers
|
| This project requires a lot of masking. each piece that you will be adding the the Octopus could in reality be done in any order -Start with the octopus in a new file, then load the Colourful rocks, Toucan parts, and carrots in separate files, and mask them out. an easy way to quickly mask is to use the quick selection tool (W), select the object, then go up to Select>Inverse to select everything but the object, then mask and use the paint bucket tool (G) and paint away the background. -back to the Octopus, bring in a cut out carrot, then copy (Ctrl J) it two times, so you have three of them, arrange them in the crown-like shape that you see in the final product, then merge the layers, and use the clone stamp (S, Alt to select a paste) to make it look like one solid piece. -Bring the Toucan Head in, and begin by aligning it with the octopus head. cut out the octopus eyes with the selection tool, then copy paste them and place it over the Toucan head. using a light eraser, blend it in to the toucan head, or use the clone stamp to lightly blend it in. do the same thing with the carrots to make the crown like shape. -blend in the toucan head with the Octopus by using the techniques mentioned before, then select the beak of the toucan. bring in your Durian image, and align it to the beak. with the beak still selected, go to the durian layer, and mask the layer, making it fit over the beak. multiply the layer to make it look better. -bring in the colourful pebbles, and either fit it over the whole octopus, or copy paste a few, fit them across, then merge with the clone stamp (The latter looks better with these images). select the octopus, then on the pebbles layer, mask it. multiply the layer. -bring in the toucan wing, and fit it to the side of the Octopus, copy paste, and do the same thing on the other side. bring in the peacock feathers, copy paste a few, then fit it over the wings. select the wing, them go to the peacock feather layer (merge the peacock layers and clone stamp them together). and mask, do it for both sides. mask the part of the wings that overlap the rest of the creature. to change the background, copy all the layers, merge them, cut out the creature, then bring in a new background |
||

Thursday, February 27, 2020
Photoshop Texture Change and Morphing - Cthulhu
Tuesday, February 25, 2020
Photoshop Texture Change - Strawberry-car
 Original Car |
 Original Strawberry |
|---|---|

New Background
|

Strawberry car w/
new background
|

Layers
|
|
| -Start by loading up the car image and masking away the background by using the brush tool on the mask layer -mask the strawberry in another file, to where only the strawberry, not including the green part, remains. save the file. - back to the car file, go to File>Place Embedded, then chose your straw berry file. -lower the opacity of the strawberry layer so you can see the car as you line it up -depending on your image, either size the strawberry to cover the car, or copy the layer (Ctrl C, Ctrl V, or Ctrl J on the layer to make copies) to fit the car, then use the Clone stamp tool (S for the shortcut). When using the stamp tool, Press ALT when hovering over a part of a strawberry to choose the texture, then blend the fruits together to make it look like one strawberry. -now mask the strawberry layer with the car mask, to make it so that the strawberry only covers the car -On the strawberry mask, remove the parts of the strawberry that cover parts like the windows, headlights, wheels, or the front grill with the brush tool. -you should have a car without any background remaining, if you do have a background still, just mask it away. -save the file -in a new file, open your new background, then go to File>Place embedded, and chose the strawberry car -place the car to where it looks like it's sitting on the road, and use the burn and dodge tools on the car to make it the lighting look realistic |
|
Thursday, February 20, 2020
Photoshop Texture Change - Rhino Leopard

Original Rhino
|

Original Leopard
|
|---|---|

Rhino-leopard
|
Layers
|
| -Begin the process by having the leopard and Rhino in two separate Photoshop files, then mask and remove the backgrounds of the animals -move the leopard file into the Rhino, using the place embedded feature in File, or alternatively, have the leopard layer in the same file as the rhino, and copy-paste the leopard, both ways create a clean outline of the leopard, but masking lets you fix any mistakes. -manipulate the leopard to closely fit the rhino as best as possible, whether that's using Cntr-T or morphing the leopard -the reason to have the leopard copy-pasted or embedded is to have the layer without a mask, because we're going to apply the mask of the Rhino, on to the leopard. - select the leopard layer, make sure you're not on the mask, the use the liquify tool in Filter>Liquify -you'll see a red border around what would be the Rhino, along with the leopard. the goal is to fill the blank shape with leopard, until completely full. don't worry about any overlap, because you've re-applied a mask, you can erase any of it. -while on the leopard layer, change the mode of the layer to Multiply, this will add the original shadows of the Rhino, making it look realistic |
|
Photoshop Texture Change - Tiger-Dog
| Tiger-Dog | ||
|---|---|---|

Tiger skin - for body and ears
|

Tiger head
|

Tiger Body - not used but provided in the tutorial
|

Layers
|

Final product W/ new background
|

Original Dog
|
| This was a easier tutorial, just had the most steps out of them all. -Start with making a mapping layer of the dog, by making a black and white copy of the dog, then closing and saving it(This is in a new document) -drag the tiger head in, and use the move tool to resize the head, then use this: 
This lets you resize the tiger head to the dog head by morphing it
-next, mask the tiger head, and hide every
|
||
Tuesday, February 11, 2020
Photoshop Morphing - Squion

Squion
|

Layers
|
|---|---|

Original Lion
|

Original Squirrel
|
| This was a easier tutorial than the last two, all I did was the following; -Cut the Lion head out, then put it on the squirrel file -mask the cutout lion head to erase any left-over background -size the lion head to the squirrel, and again, erase any background or part of the lion head to make it fit the body better I did a very slight color balance on the lion head, making it slightly more red, as well as masking where the head connects to the body with a very light brush (low hardness) For the background I merged the layers, than copy-pasted the outline i made around the Squion. I then used the clone stamp tool to make the tail look bushy again because cutting hair in Photoshop never looks good. I also clone stamped the log it sat on to elongate it, then used the burn and dodge to make the cut-out look like it belonged in the new background |
|
Monday, February 10, 2020
Photoshop Morphing - Cassogirafurtle
| CassoGirafurtle | ||
|---|---|---|

Original Girrafe
|
Original Mata Mata Turtles
|

Original Cassowary
|

CassoGirafurtle
|
I used the head and shell of the turtle, the neck of the girrafe, and the body of the Cassowary. I masked the rest of each part of the animal out, then pieced them together as you see. I darkened the girrafe neck using the burn tool to make it match a bit better. then cut it out and pasted it in the forrest background |

Layers
|
Friday, February 7, 2020
Photoshop Morphing - Crocofrog

Crocofrog
|
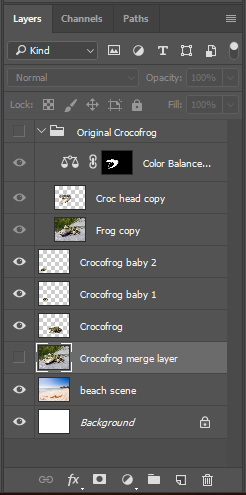
Layers - including original Crocofrog layers
|
|---|---|

Original Frog
|

Original Crocodile
|
| - I followed the tutorial close to exactly how it says, meaning no layer masking, just erasing when cutting the Crocodile - when erasing the colour change of the crocodile head, I didn't erase any of it on the top of the head because it made it look worse as apposed to making an improvement - for my background, I chose a beach scene with two baby Crocofrog's, to do this all I did was 1. copied and merged all the layers to make one picture 2. cut out the Crocofrog and inserted the new scene 3. copied the frog twice, flipped them horizontal, and added some shade below using the burn tool |
|
Wednesday, February 5, 2020
Two Tutorial Post
Title:
|
|---|
| URL: https://www.youtube.com/watch?v=4vvamtfb3NY |
Video:
|
Title:
|
|---|
| URL: https://www.youtube.com/watch?v=-l7M13OUQck |
Video:
|
Subscribe to:
Comments (Atom)